Learn how to dry fresh mint using a simple step-by-step oven method. Preserve garden mint for drinks, desserts, savory recipes, and year-round pantry uses.

How to Dry Fresh Mint for Drinks, Desserts & Savory Recipes
How to Dry Fresh Mint for Tea, Cocktails, Desserts, and Savory Recipes
There comes a point every summer when the mint seems to take over the garden.
It spills over pathways, reaches into neighboring beds, and grows faster than any recipe could possibly keep up with. One day you are clipping a handful for iced tea, and the next you are standing in front of an entire patch wondering what on earth to do with it all.
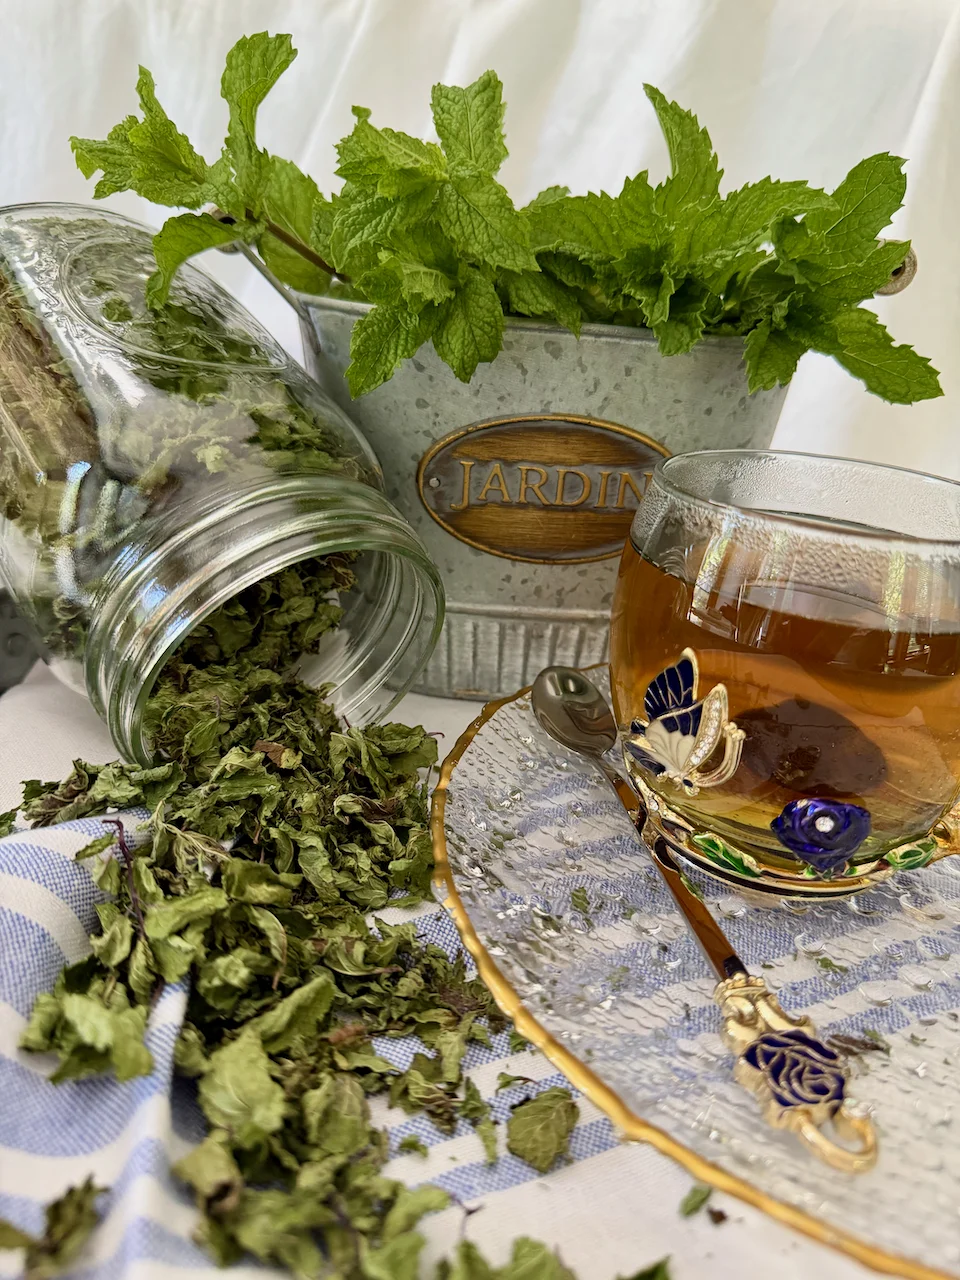
For me, drying mint has become part of the rhythm of the season. It feels a little like bottling summer itself. The bright fragrance fills the kitchen, the leaves become concentrated with flavor, and jars of dried mint line the pantry shelves long after frost settles across the garden.
Throughout the colder months, those jars find their way into hot tea, cooling tzatziki, lemon scones, marinades, fruit desserts, and refreshing cocktails. Even the stripped stems have a purpose, adding a gentle herbal aroma when tossed onto the grill or tucked into a fireplace.
If your garden is overflowing with mint, this simple method preserves its flavor beautifully while creating a pantry staple you’ll reach for all year.
Why Dry Fresh Mint?
Fresh mint is wonderful, but dried mint offers convenience and concentrated flavor.
Drying mint allows you to:
- Preserve large harvests before the leaves decline
- Enjoy garden-grown mint year-round
- Create homemade herbal tea blends
- Add flavor to baked goods and desserts
- Enhance savory dishes like lamb, yogurt sauces, and grain salads
- Make cocktails and mocktails with pantry ingredients
- Reduce food waste from abundant summer harvests
Properly dried mint can maintain excellent flavor for up to a year when stored correctly.
Types of Mint Commonly Used in Cooking
The first herbs I planted, long ago, was probably a mint plant, simply because I love using fresh mint leaves in many of the foods I prepare. However, not all mint tastes the same. While there are hundreds of varieties, a few stand out in the kitchen.
- Chocolate mint – which did not taste like chocolate, though it carries subtle cocoa notes and pairs wonderfully with ice cream, hot chocolate and chocolate mint cakes.
- Orange mint – pleased with its slightly citrus notes which lent to a citrus aspic, or an orange cake with added bright flavors.
- Apple mint – also caught my eye, and found it a softer fruitier flavor for drinks and apple baked goods.
- Peppermint and spearmint are the only two varieties of mint that I grow regularly, creating a stronger and more intense flavor, one I use in so many recipes.
Especially delightful, if you grow your own mint, is that they actually grow by themselves. I planted a few years ago, and now they have meandered all around my gardens, and return every year.
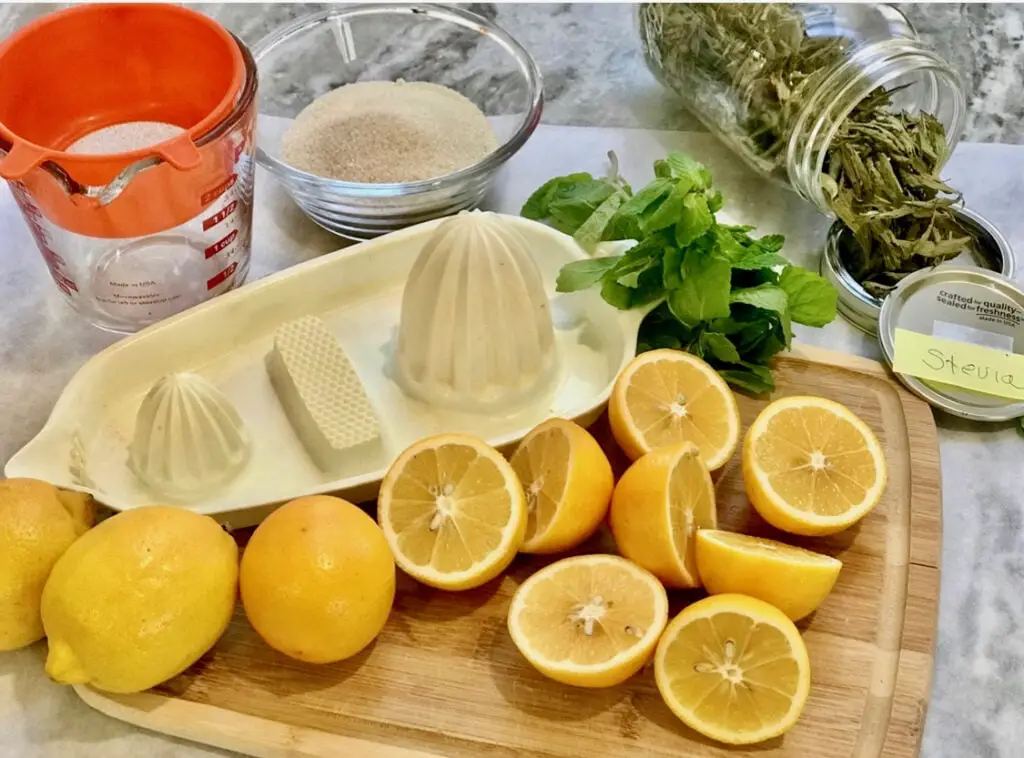
Ingredients You Will Need To Dry Your Own Mint
8 Cups Fresh Mint Stems and Leaves – Garden fresh mint is the star of the recipe. Harvesting long stems allows you to use both the leaves and the stalks. The leaves become dried culinary mint, while the stems can later be used for grilling or aromatic fires.
6 Cups Water – A thorough rinse removes dirt, sand, insects, and garden debris. Clean leaves dry more evenly and store better over time.
Equipment You’ll Need
Large Cookie Sheet – Provides plenty of surface area so the mint dries evenly without steaming.
Parchment Paper – Prevents sticking and promotes gentle airflow beneath the leaves.
Kitchen Towels – Absorb excess moisture after washing, helping the drying process begin efficiently.
16-Ounce Glass Jar with Lid – Glass helps preserve flavor and prevents moisture from entering during storage.
Twine – Perfect for bundling leftover stems for grilling or aromatic use.

How to Dry Fresh Mint in the Oven
This low-temperature drying method preserves color, aroma, and flavor while requiring very little hands-on work with 4 easy steps: harvest, wash, dry, and crush.
Step 1: Harvest the Mint
Gather mint with the longest stems possible, taking care not to disturb the roots.
Long stems provide two benefits:
- Plenty of leaves for drying
- Stalks that can later be used for grilling or aromatic purposes
For best flavor, harvest mint in the morning after the dew has dried but before the strongest afternoon heat.
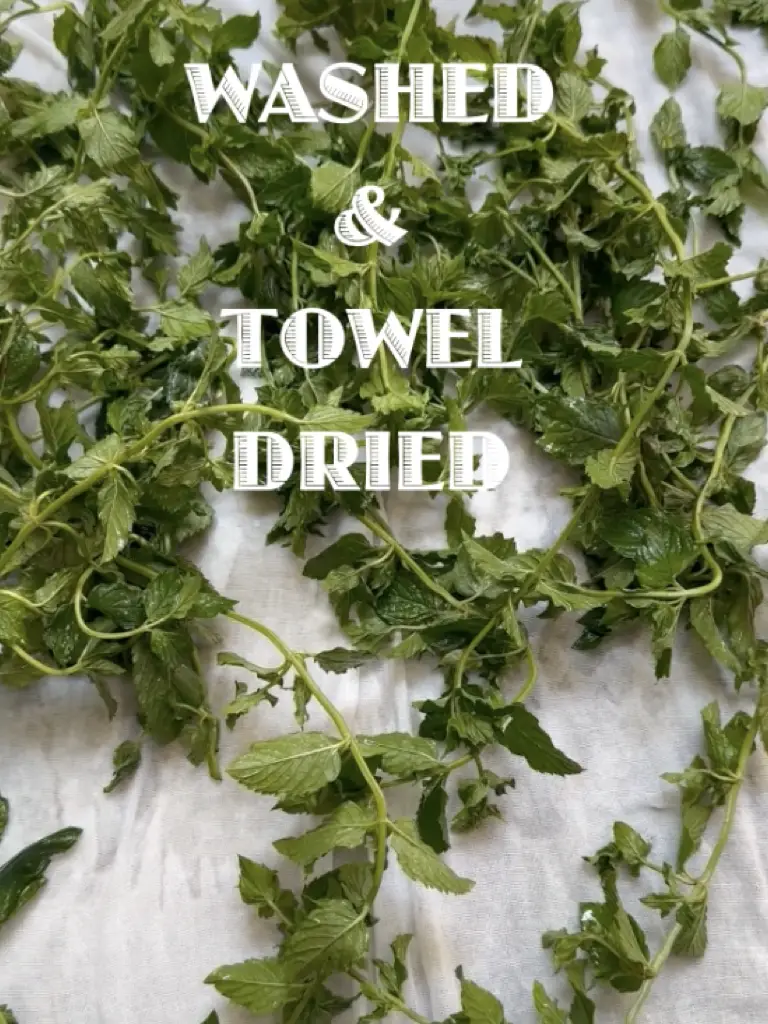
Step 2: Wash the Mint Thoroughly
Place the mint into a large bowl filled with water.
Swish gently and drain.
Repeat several times until no dirt or sand remains at the bottom of the bowl.
Garden-grown mint often hides surprising amounts of soil between its leaves.
Step 3: Dry the Surface Moisture
Spread the washed mint onto clean towels.
Allow the towels to absorb excess water before moving on to the drying process.
Removing surface moisture helps prevent steaming in the oven, unless you have a steam distiller and plan to extract some of the essence of the mint, something I often do with rose petals.
Step 4: Prepare the Baking Sheets
Preheat the oven to 175°F.
Line one or two cookie sheets with parchment paper.
Spread the mint in a single layer.
Avoid piling the leaves, as good airflow promotes even drying.
Step 5: Dry the Mint
Place the trays into the oven for 10 minutes.
Turn the oven off completely.
Leave the mint inside the warm oven for several hours.
The residual heat slowly removes moisture without scorching the leaves.
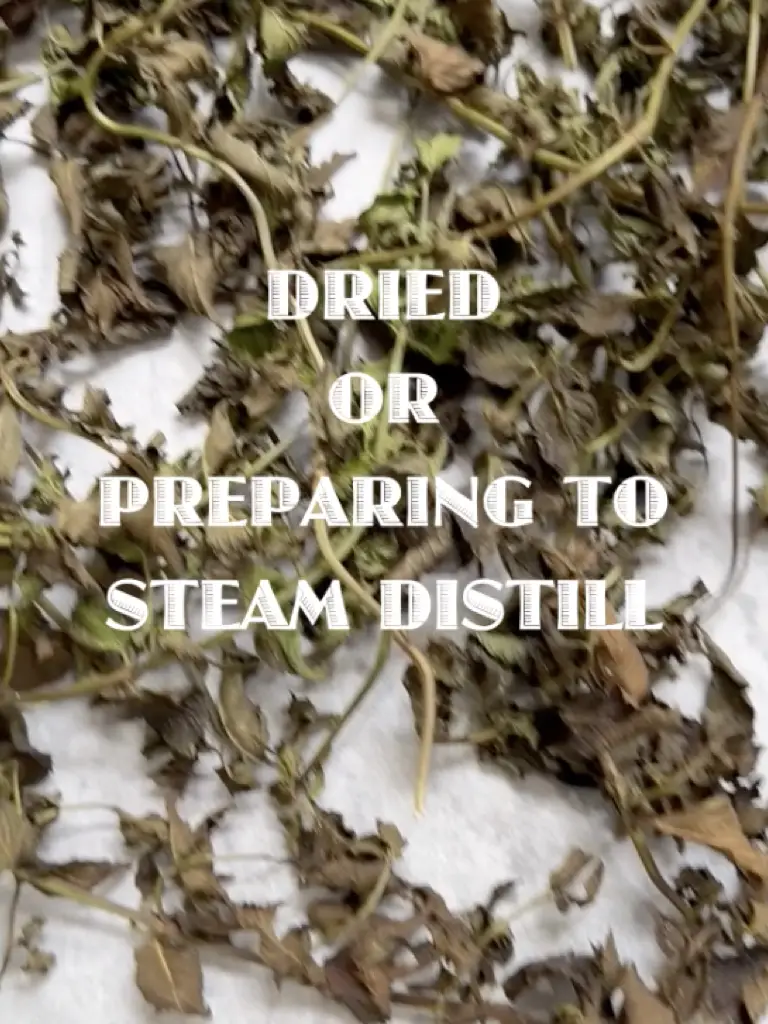
Step 6: Finish Drying Overnight
Remove the trays from the oven and allow the mint to sit out overnight.
By morning, the leaves should feel dry, crisp, and crumble easily between your fingers.
Step 7: Strip and Crush the Leaves
Remove the dried leaves from the stems.
Crush gently by hand to your desired consistency.
Some cooks prefer larger flakes, while others like a finer texture for tea blends and baking.
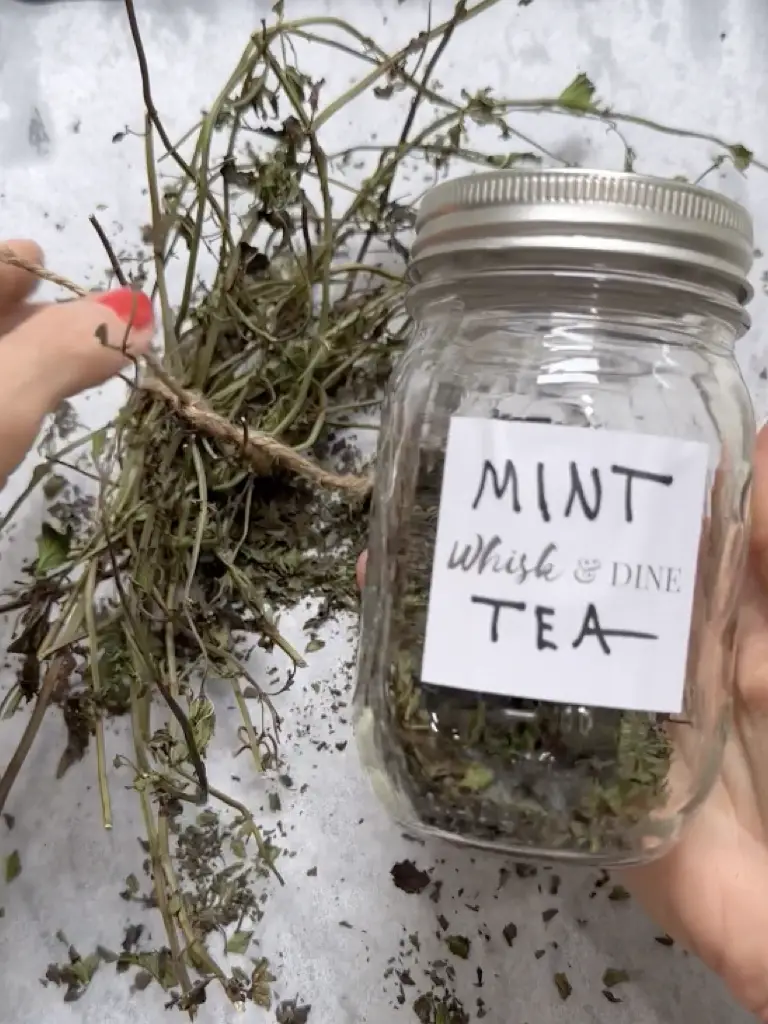
Step 8: Store for Long-Term Use
Transfer the dried mint to a clean glass jar with a tight-fitting lid.
Store in a cool, dark pantry away from sunlight and moisture.
Properly stored mint remains flavorful for up to one year.
Step 9: Save the Stems
Gather the stripped stems and tie them into bundles with twine.
The stems can be:
- Added to charcoal or wood fires while grilling
- Burned in an outdoor fire pit
- Used for gentle aromatherapy in a fireplace
It’s a wonderful way to use every part of the harvest.

FAQ
How long does dried mint last?
When stored in an airtight glass jar in a cool, dark place, dried mint typically maintains good flavor for up to one year.
Can I air-dry mint instead of using the oven?
Yes. Mint can be bundled and hung upside down in a warm, dry location with good airflow. This process usually takes one to three weeks.
Should I dry mint leaves on or off from the stems?
Keeping the leaves attached during drying helps preserve flavor and makes handling easier. Remove the leaves after drying.
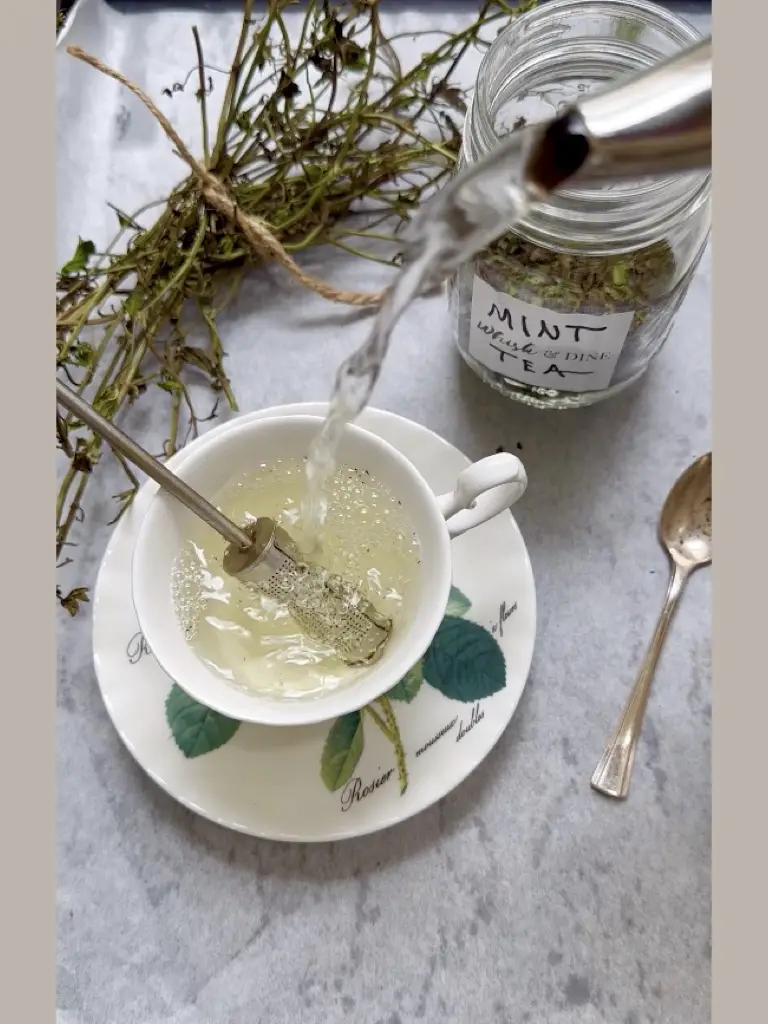
Can dried mint be used for tea?
Absolutely. Dried mint makes excellent herbal tea and often develops a richer flavor than fresh mint.
What’s the best mint for drying?
Spearmint is generally considered the best all-purpose culinary mint, though peppermint is excellent for tea and desserts.
Why is my dried mint turning brown?
Excessive heat or prolonged exposure to sunlight can cause discoloration. Low-temperature drying helps preserve the mint’s natural color.
Ways to Use Dried Mint
One of the best things about drying mint is how many recipes benefit from its bright herbal flavor.
Beverages
- Mint tea, Iced or Hot, from fresh or dried leaves.
- Hot Chocolate with Mint infused liquor (or muddled mint), and homemade real hot chocolate, using milk of your choice. A festive fireside sip.

- Lemonade, a healthy homemade lemonade recipe of freshly squeezed lemons, sweetener of choice, mint leaves and lots of ice for the best lemonade.
- Mint Watermelon Cocktail or Mocktail, a refreshing watermelon mint cocktail is bright and icy, made with fresh lime and homemade mint syrup, with an easy mocktail version perfect for summer gatherings.

Savory Recipes
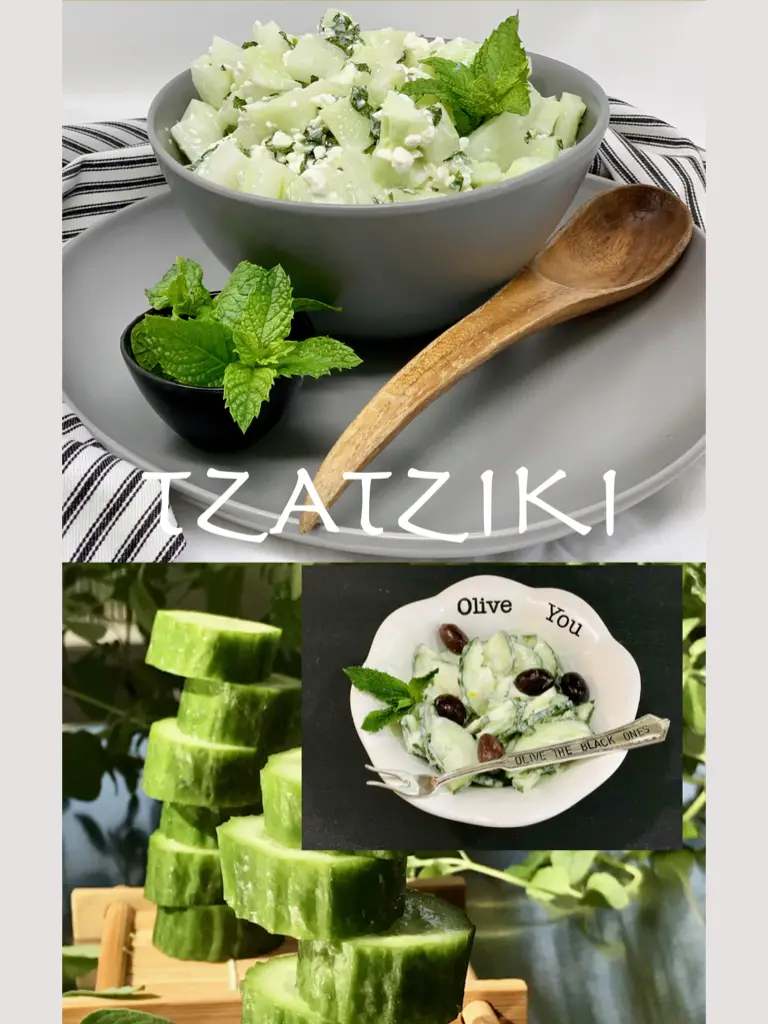
- Tzatziki sauce or side, an authentic Greek tzatziki made with thick yogurt, cucumber, garlic, lemon, and mint or dill is a refreshing Mediterranean sauce for summer meals.
- Pea Mint Pesto a vibrant pea pesto recipe with olive oil, lime, garlic and herbs is the perfect spring spread.

- Seared Scallops Over Mint Pea Pesto with garden fresh peas, perfectly seared scallops, dotted with a rich beurre blanc; better than restaurant dining.

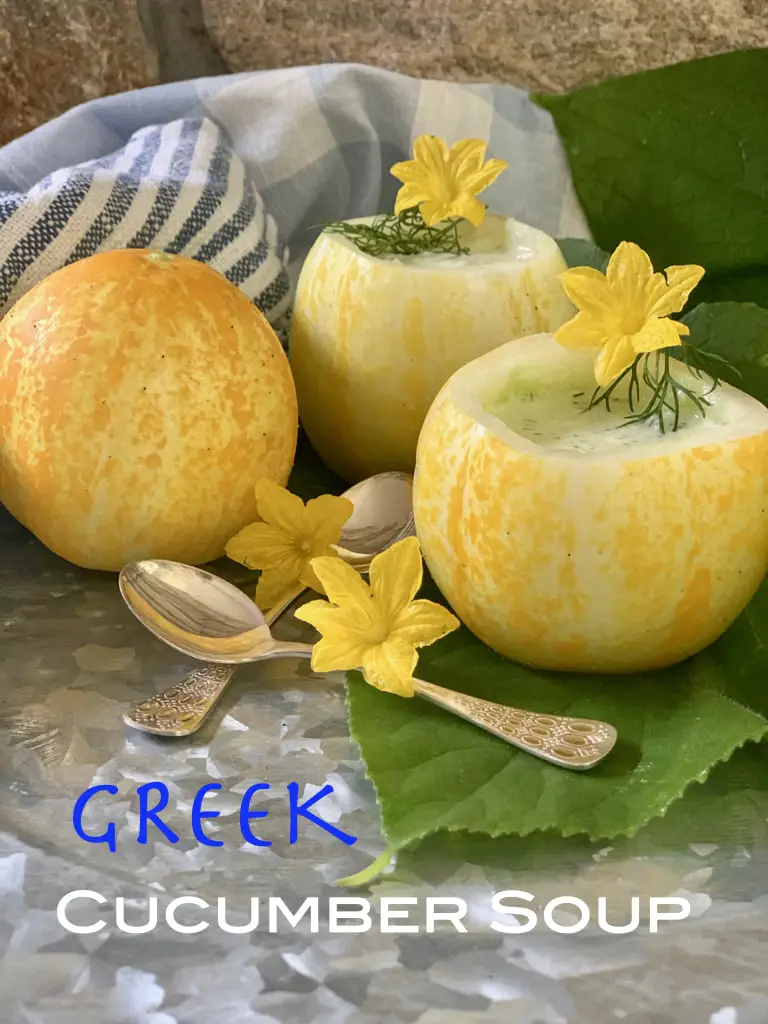
- Yogurt sauces or Lemon Cucumber Cold Soup a refreshing chilled soup recipe made the Mediterranean way, using heirloom lemon cucumbers, yogurt, lemon and fresh herbs!
- Marinades and Dressings the best Mediterranean dressing recipe collection for marinades and favorite dishes and all 5 are easy and delicious.
Sweet Recipes
- Lemon Mint Scones so bright with fresh lemon zest and garden mint, lightly sweetened, and made with oat flour for a tender crumb

- Fruit salads a sweet watermelon, salty feta salad on a bed of healthy greens or turned into a whimsical Rubik Cube over basil,
- Ice cream if you’re ready to go beyond chocolate and vanilla, these unusual ice cream recipes, many made with garden ingredients, will blow your mind and tempt your taste buds all summer!
- Citriburst Finger Lime Mojito Mousse created just for this unusual ‘finger lime caviar’ Australian fruit.

Mint Is A Distinct Herb That Practically Grows By Itself So Do Consider A Pot Or Plot Of Dirt For Mint As One Of Many Fresh Ingredients You Love To Cook With As You Will Always Find From My Fresh Mint Garden!
If your mint patch is growing faster than you can use it, don’t let a single leaf go to waste. Dry a batch now and enjoy the flavor of summer in teas, cocktails, baked goods, and savory recipes all year long.
If you try this method, I’d love to hear how you use your dried mint. Leave a comment below and share your favorite mint recipe from the garden, and do get yourself a copy of Dirt to Dish for more garden treasures and inspiration.
How to Dry Fresh Mint for Drinks, Desserts & Savory Recipes
Equipment
- Cookie sheet
- Parchment paper
- 16 oz Glass jar with lid
- 12 inches Twine
Ingredients
- 8 cups Fresh mint stems and leaves
- 6 cups Water
Instructions
- Gathering the mint with the longest stems possible, without pulling up the roots, offers plenty of flavor for both cooking, and to infuse flavor while grilling by using the stalks in the fire, once the leaves have been stripped.
- Immerse the mint in water and rinse the water several times. There is often sand and dirt in the mint.
- Lay the washed mint out on towels to absorb the water. Allow the towels to absorb excess water before moving on to the drying process.Removing surface moisture helps prevent steaming in the oven.
- Preheat the oven to 175. Line one or two cookie sheets with parchment paper.Spread the mint in a single layer.Avoid piling the leaves, as good airflow promotes even drying.
- Spread the mint onto the prepared cookie sheets. Place in the oven for 10-minutes, turn off the oven and leave the mint in the oven for several hours.
- Remove the mint from the oven and allow it to sit out overnight.
- The mint should now be dried and crisp enough to strip all the leaves from the stalks. Crush the dried leaves by hand.
- Store in a glass jar with a lid.
- Gather the stalks stripped of leaves, and tie twine around them to be used in the grill to impart flavor while cooking or in the fireplace for aromatherapy.
Notes

I believe the table... that place that draws people to gather, is the most powerful symbol of togetherness. All that happens before the table is set, the planning, the gathering, the preparing, are all an intricate part of the dance that create the mood of celebration to share with friends and loved ones.